Main menu Open search

Blog

What Are 7 Essential Dismantling Joint Buying Tips?

Buying a Dismantling Joint is not merely a matter of selecting the correct diameter. It is a decision about maintenance access, pipeline safety, and long-term operating costs. A joint may look impressive on paper, yet fail expectations when flange spacing, bolt movement, or site conditions are ignored.

Pipeline engineer Daniel Mercer explains, “A dismantling joint should solve maintenance problems before they become emergencies.” That principle deserves attention. The right product can create controlled clearance around a valve, pump, or flow meter. It can also reduce installation strain during alignment. Small details matter. A few missing millimetres can delay an entire repair.

This guide presents seven essential Dismantling Joint buying tips for engineers, contractors, and facility managers. It examines size, pressure rating, materials, corrosion protection, sealing performance, adjustment range, and supplier reliability. Each point connects product data with real installation conditions. Check the pipeline drawing. Confirm the flange standard. Ask for test records and traceable material information. Review the warranty before signing.

Experience also teaches a less comfortable lesson. The cheapest quotation can become expensive after delivery. Some buyers focus on price and overlook coating thickness, gasket quality, or technical support. I have seen specifications copied without checking actual site measurements. That mistake is avoidable, but not always prevented. No checklist removes every risk. Careful questions, documented evidence, and honest technical review provide stronger protection than confident assumptions.
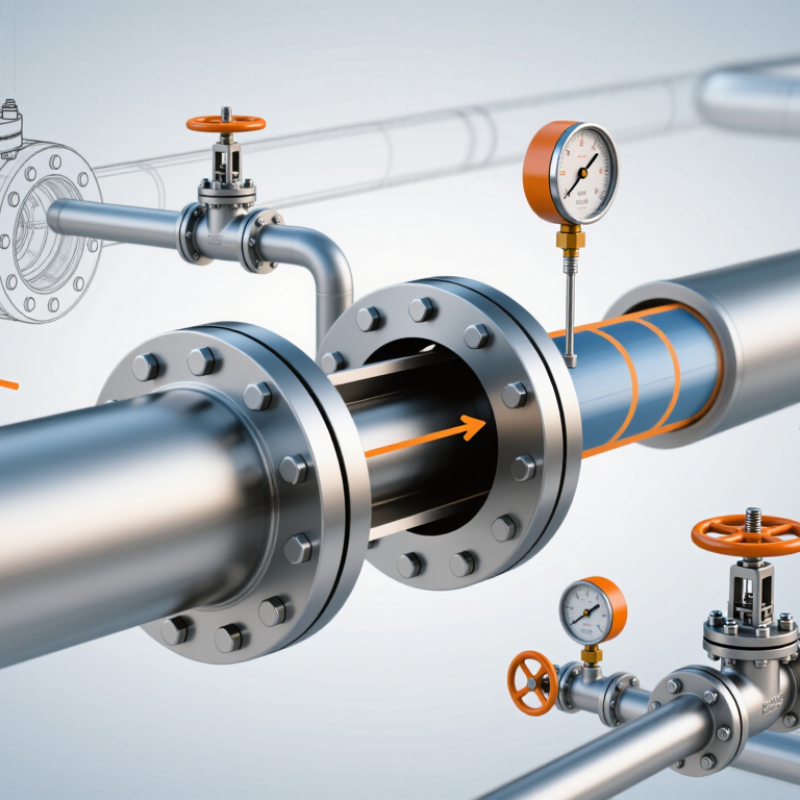
What Are 7 Essential Dismantling Joint Buying Tips?

Define the Dismantling Joint and Its Main Applications

A dismantling joint is a flanged pipe fitting that connects two pipe ends while allowing controlled axial movement. Its adjustable center section helps installers remove valves, meters, and pumps without cutting the pipeline. Many designs use tie rods, flanges, gaskets, and bolts to maintain alignment and sealing.

Its main applications include water treatment plants, sewage networks, industrial cooling lines, and fire-protection systems. The U.S. Environmental Protection Agency estimated a 20-year drinking-water infrastructure need of $625 billion in its 2023 assessment. ASCE gave U.S. drinking-water infrastructure a C- grade in its 2021 Report Card. These figures show why maintainable joints matter. Still, a dismantling joint cannot correct poor pipe support or incorrect flange alignment. That detail is often underestimated.

Tip 1: Confirm pipe outside diameter, flange drilling, pressure rating, and material before buying. A small mismatch can create leakage beside a new valve.

Tip 2: Check the adjustment range. Measure the real installation gap, including gasket thickness and thermal movement. Do not rely only on catalogue dimensions.

Tip 3: Review corrosion protection and bolt material for buried or humid locations. The ground may look harmless. It is not always harmless.

Tip 4: Request test certificates, installation instructions, and traceable quality records. EN 545, EN 598, or equivalent standards may apply, depending on the service. However, standards alone do not guarantee a suitable product; engineers must still verify pressure, temperature, media, and support conditions.

Check Compatibility with Pipe Size, Material, and Pressure Rating

A dismantling joint should match the pipe’s actual size, material, and pressure rating. Do not rely only on the nominal diameter printed on an old drawing. Measure the pipe outside diameter, flange drilling, and face-to-face space on site. A small dimensional error can make installation difficult or create uneven sealing pressure.

Check whether the joint suits ductile iron, steel, PVC, or another pipe material. Each material expands, flexes, and grips differently. Review the gasket compound against the conveyed water, temperature, and treatment chemicals. The joint must also tolerate the system’s working pressure and possible pressure surges. A rating suitable for normal flow may fail during pump starts or valve closures. Ask for pressure-test records, material certificates, and clear installation instructions.

Movement allowance matters too. Confirm how much axial adjustment the joint provides, then compare it with the pipe gap and expected thermal movement. Verify that tie rods, bolts, and coatings resist the surrounding soil or moisture. I once saw a correctly sized joint leak because the installer measured flange diameter but ignored the pipe’s actual outside diameter. That mistake was avoidable. It is also worth checking whether the joint can be tightened evenly with available tools. Specifications may look perfect on paper. Field access can prove otherwise. Look closely at tolerances, bolt length, gasket position, and the manufacturer’s recommended tightening sequence before purchasing.

Evaluate Joint Design, Adjustment Range, and Sealing Performance

What Are 7 Essential Dismantling Joint Buying Tips?

A dismantling joint should match the pipe material, nominal diameter, pressure class, and connection method. Review the body design, flange thickness, bolt pattern, and internal clearance before ordering. A compact design may simplify installation, but limited movement can create stress during maintenance. Check the adjustment range carefully. It should allow enough longitudinal movement for valve removal without forcing adjacent pipes. Measure twice.

The joint’s sealing system deserves equal attention. Confirm the gasket material, seating profile, and pressure-temperature rating. A resilient gasket may handle minor surface irregularities, but it still needs clean, parallel flanges. Inspect the gasket groove for sharp edges and uneven compression. Check the bolts, washers, and tightening sequence. Do not over-tighten. Excessive force can distort the flange and reduce sealing reliability. Ask for pressure-test records and technical drawings, not only a product brochure.

Installation conditions can expose weaknesses that appear acceptable on paper. Consider buried chambers, wet environments, vibration, and repeated disassembly. Protective coatings should suit the surrounding soil or water chemistry. Verify that the joint can tolerate expected pipe movement without losing alignment. A small adjustment range may look economical, yet it can increase labor later. I have seen maintenance teams underestimate this point. That mistake is avoidable. Confirm inspection access, replacement gasket availability, and the supplier’s documented quality controls before approving the purchase.

Verify Standards, Manufacturing Quality, and Supplier Reliability

Buying a dismantling joint requires more than comparing prices. Check the required pressure rating, diameter range, flange drilling, and movement allowance against your pipeline drawings. Confirm that the proposed product follows the relevant industry standards and project specifications. Ask for current certificates, not screenshots from an old quotation.

Inspect manufacturing quality closely. Request material certificates with heat numbers for the body, flanges, bolts, and sealing parts. Review welding procedures, dimensional inspection records, coating thickness, and pressure-test results. A reliable manufacturer should explain how factory tests are performed and stored. Ask whether each unit receives a final inspection before shipment. Small gaps in documentation can become expensive installation problems.

Supplier reliability deserves equal attention. Check production capacity, realistic lead times, packaging methods, and replacement-part support. Speak with recent customers about delivery accuracy and response after installation. A factory visit or live video inspection may reveal more than polished photographs. Do not accept vague answers about traceability or testing. I once treated a low quotation as the best value; the missing inspection details later caused avoidable delays. That judgment needed more discipline. Compare complete evidence, not attractive numbers. Also confirm that technical staff can review unusual pipe movements and installation conditions. Seven practical checks matter: standards, materials, testing, dimensions, coating, delivery, and service. Each protects performance in the field.

7 Essential Dismantling Joint Buying Tips

Verify standards, manufacturing quality, pressure compatibility, inspection evidence, and supplier reliability before placing an order.

1. Verify standards: Confirm the applicable EN, ISO, AWWA, or project specification.
2. Match pressure rating: Select a PN class that meets the system design pressure.
3. Check materials: Review ductile iron, steel, coating, bolt, and gasket specifications.
4. Confirm dimensions: Match flange drilling, pipe outside diameter, and adjustment range.
5. Review testing: Request hydrostatic, dimensional, coating, and traceability records.
6. Assess manufacturing quality: Check process controls, inspection plans, and batch consistency.
7. Evaluate supplier reliability: Confirm technical support, lead time, documentation, and after-sales service.

The chart shows commonly specified nominal pressure classes in bar. Final selection must follow the approved design pressure, transient conditions, flange standard, and project requirements.

Compare Total Costs, Installation Needs, and Long-Term Maintenance

What Are 7 Essential Dismantling Joint Buying Tips?

A dismantling joint should be judged by its complete service cost, not its purchase price. Ask for material certificates, pressure ratings, and test records before comparing quotations. A low-cost joint may require extra gaskets, special tools, or frequent retightening. Request a five-year estimate covering purchase, freight, labor, inspections, and replacement parts. Include downtime. Even a short shutdown can exceed the joint’s original price.

Installation conditions deserve equal attention. Confirm the pipe diameter, flange standard, working pressure, temperature, and available adjustment length. Measure the actual site, because drawings are sometimes outdated. Check whether the joint needs anchors, supports, or controlled bolt torque. Clear access can reduce installation hours significantly. Field technicians often find that poor alignment causes leakage and uneven loading. That mistake is avoidable, but not always noticed during purchasing.

Long-term maintenance depends on access, corrosion resistance, and spare-part availability. Choose fasteners and coatings suitable for the surrounding soil, humidity, or chemicals. Ask how often bolts, seals, and protective surfaces should be inspected. Keep replacement dimensions in the maintenance file. A joint that looks durable may still fail early if drainage is poor. No estimate is perfect. Seasonal temperature changes, unexpected vibration, and difficult access can change the real cost. Review those risks with installers, not only with sellers.

What Are 7 Essential Dismantling Joint Buying Tips? – Compare Total Costs, Installation Needs, and Long-Term Maintenance

Tip What to Compare Practical Buying Data Installation Requirements Long-Term Maintenance Impact Recommended Check
1. Verify the Size and Pressure Class Nominal pipe diameter, flange drilling, pressure rating, and operating temperature. The joint should match the pipe nominal diameter and the connected flange standard. The pressure rating must meet or exceed the system design pressure, including surge conditions. Confirm bolt-hole alignment, flange face dimensions, available adjustment length, and lifting access before delivery. Correct sizing reduces leakage, bolt overstressing, gasket damage, and unplanned replacement. Request a dimensional drawing and verify diameter, face-to-face range, flange standard, and pressure class against the piping design.
2. Compare the Total Installed Cost Purchase price, freight, lifting, labor, gaskets, bolts, tools, inspection, and downtime. A lower purchase price may be offset by heavier handling equipment, additional adaptors, longer installation time, or more frequent retightening. Estimate crew size, isolation and draining time, flange preparation, bolt tightening, pressure testing, and reinstatement. Include gasket and fastener replacement, inspection labor, corrosion treatment, and the cost of future shutdowns. Use this calculation: Total Cost = Purchase + Logistics + Installation + Testing + Scheduled Maintenance + Downtime.
3. Confirm Material Compatibility Joint body, flange, bolts, coating, gasket, and the conveyed fluid. Material selection should account for water quality, chemicals, temperature, abrasion, external humidity, and soil or marine exposure. Keep sealing surfaces clean and prevent damage to protective coatings during handling and alignment. Compatible materials reduce galvanic corrosion, coating failure, gasket degradation, and leakage risk. Review material certificates, coating specifications, gasket compound, bolt material, and service-fluid compatibility.
4. Check Adjustment and Restraint Capacity Axial adjustment range, allowable angular movement, tie-bolt arrangement, and pressure-end load control. Adjustment range is useful for installation tolerance, but it must not be treated as a substitute for proper pipe supports or anchorage. Set the joint within the manufacturer’s permitted range, install tie rods correctly, and provide required thrust restraint. Correct restraint limits movement, protects connected equipment, and reduces stress on flanges, bolts, and gaskets. Ask for allowable movement limits, bolt torque requirements, thrust calculations, and support details.
5. Evaluate Installation Simplicity Weight, access, bolt accessibility, required tools, adjustment method, and inspection points. A design that permits straightforward axial adjustment and accessible bolting can reduce labor time and installation errors. Provide a stable trench or work platform, lifting equipment suitable for the joint weight, clean flange faces, and controlled bolt tightening. Accessible components make visual inspection, torque checks, coating repair, and gasket replacement easier. Review the installation sequence and confirm whether a calibrated torque wrench and special tooling are required.
6. Review Testing and Documentation Pressure-test requirements, inspection records, material certificates, drawings, and installation instructions. Documentation should identify dimensions, materials, pressure rating, coating system, allowable movement, tightening sequence, and test conditions. Inspect flange alignment, bolt installation, gasket seating, joint position, and leakage during the specified test. Complete records support troubleshooting, warranty claims, future procurement, and planned maintenance. Require an inspection and test plan, product drawings, certificates, torque data, and signed installation records.
7. Plan for Long-Term Maintenance Inspection frequency, corrosion protection, bolt accessibility, spare parts, and expected service environment. Maintenance needs depend on pressure cycling, vibration, temperature changes, external exposure, and the criticality of the pipeline. Allow sufficient clearance for inspection and bolt access; use approved lifting and isolation procedures during future removal. Periodic visual checks should look for leakage, corrosion, coating damage, loose fasteners, flange displacement, and abnormal movement. Create a maintenance schedule and keep replacement gaskets, compatible fasteners, coating repair materials, and dimensional records available.
Buying principle: Select the dismantling joint with the lowest credible life-cycle cost, not simply the lowest initial price. Confirm that the joint’s dimensions, pressure rating, materials, restraint system, installation method, and maintenance access match the complete piping system.

Exclusive Access

Unlimited Resources

Detailed information on our products to assist you with the planning of your cable management project

Register Now

BIM Files

Step Files

Installation Manuals

User Guides

Best Practice Guides

Technical Charts