What Is a Car Battery Jumper and How Does It Work?
A cold morning, a silent dashboard, and an engine that only clicks: this is where a Car Battery Jumper can help. It provides temporary electrical power so a vehicle’s starter can turn the engine. The term can describe portable jump-starting cables or a battery-powered booster pack. They work differently, but both transfer power through clamps connected to designated battery terminals.
Consumer Reports’ chief mechanic, John Ibbotson, offers a useful safety principle, paraphrased here: “Check your vehicle’s manual before connecting jumper equipment.” That step matters. Battery layouts, connection points, and recommended procedures vary between vehicles. A portable booster typically stores energy in its own battery. Jumper cables instead connect the disabled vehicle to a second vehicle’s battery. In either case, correct polarity matters: positive connects to the designated positive point, and negative connections must follow the vehicle maker’s instructions.
Small details count. Inspect cables for cracked insulation, keep clamps from touching, and never try to jump a visibly damaged or leaking battery. If the engine starts, remove the equipment in the recommended order. Not every no-start problem comes from a weak battery. A failing starter or charging system can produce similar symptoms, so a successful jump is not a diagnosis.
That distinction is easy to miss. This guide explains what a Car Battery Jumper does, how its parts work, and what to check before use. It also leaves room for an honest caution: even familiar equipment deserves a careful read of the manual.
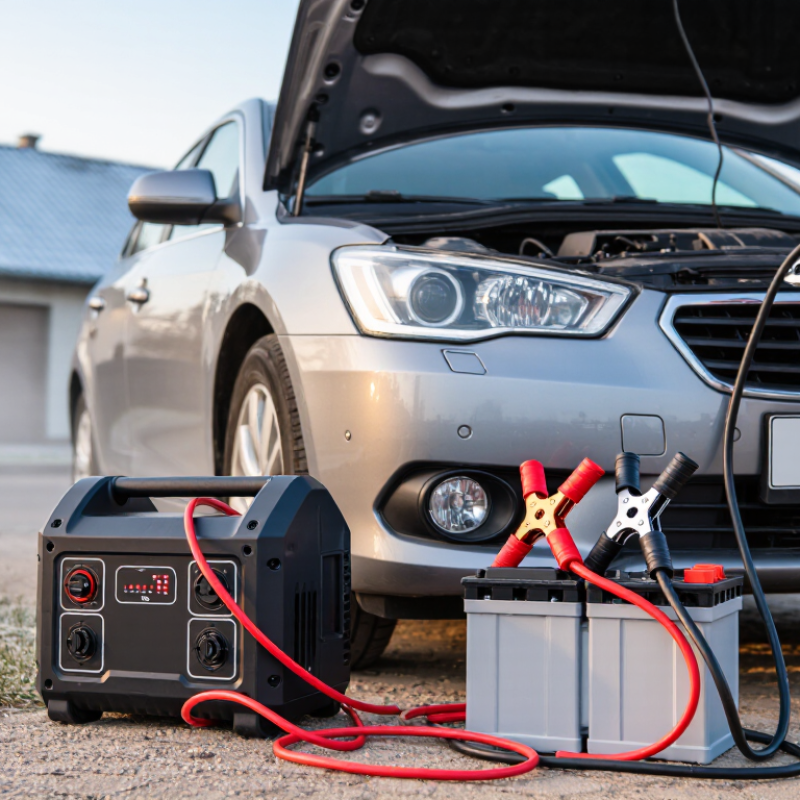
Definition and Types: Jumper Cables and 12-Volt Portable Boosters
A car battery jumper is a way to supply temporary power when a vehicle’s 12-volt battery cannot turn the starter. The term usually refers to jumper cables or a portable booster. It does not necessarily recharge a weak battery fully. Think of it as a short assist, not a repair.
Jumper cables connect a working vehicle’s battery to the one that needs help. Their thick insulated wires carry current through metal clamps. Match positive to positive, then follow both vehicles’ manuals for the remaining connections and starting order. That detail matters. A reversed clamp can cause sparks or damage. Keep clamps apart, and do not jump-start a cracked, leaking, or frozen battery.
A portable 12-volt booster stores energy in its own internal battery. You attach its clamps to the disabled vehicle, following the device instructions, then attempt to start the engine. It can be useful in a cold parking lot, where another vehicle may not be nearby. Check its charge before relying on it. I have to admit, the labels and connection steps can feel easy to rush past, especially in poor light. Slow down and verify polarity. A booster may start the car, but persistent trouble calls for a battery and charging-system check.
Battery Basics: Six Lead-Acid Cells Produce About 12.6 Volts at Rest
A conventional 12-volt lead-acid car battery contains six cells connected in series. Each cell produces roughly 2.1 volts when fully charged and rested, giving a total near 12.6 volts. “At rest” matters: the reading is taken after the battery has sat without charging or heavy use. Right after driving, surface charge can make the voltage appear higher. Temperature and battery condition also affect the measurement.
A jumper helps when a weak battery cannot deliver enough current to turn the starter. It supplies electrical energy through the vehicle’s battery connections, supporting the brief, heavy demand of starting. Voltage alone does not tell the whole story. A battery may show close to 12.6 volts and still struggle under load. That can be frustrating. Check the battery condition, cable connections, and vehicle instructions before using a jumper. Connect clamps with care, keep them clear of moving parts, and stop if a battery looks swollen, cracked, or leaking. The simple six-cell figure is useful, but real batteries are less tidy than the number suggests.
Six Lead-Acid Cells Produce About 12.6 Volts at Rest
A typical 12-volt lead-acid battery contains six cells connected in series. At full charge and at rest, each cell is about 2.1 volts, for a total of approximately 12.6 volts. A car battery jumper supplies temporary power to help start a vehicle with a weak battery.
How Boosting Works: External Current Helps the Starter Crank the Engine
A car battery jumper provides temporary electrical power when a vehicle’s battery cannot deliver enough current to start the engine. It may be a portable jump starter or jumper cables connected to another suitable battery. The goal is not to push the car forward. It is to help the starter turn the engine.
When you turn the key or press the start button, the starter motor needs a strong burst of current. A weak battery may power the dashboard lights but fail under that heavier demand. The jumper supplies extra current through the vehicle’s electrical system. This engages the starter, which turns the flywheel and crankshaft until the engine can run on its own. The process is quick, but the connections matter.
Check both vehicle manuals before connecting anything. With cables, attach the clamps in the specified order, keeping them clear of moving parts. A wrong connection can damage electrical components. Keep the clamps steady. Once the engine starts, the alternator may replenish some battery charge, but a jump is not a proper battery test or repair. A battery that repeatedly needs help may be worn, loose at its terminals, or affected by another fault. It is easy to mistake a successful start for a complete fix.
Reading CCA Ratings: SAE Tests Measure Cold-Weather Starting Current
Cold Cranking Amps, or CCA, estimates how much current a battery can deliver in cold conditions. SAE International’s J537 standard measures starting performance at 0°F (-18°C). A 12-volt battery must supply its rated current for 30 seconds while maintaining at least 7.2 volts. That is a controlled test, not a guarantee that a car will start in every winter parking lot.
The temperature matters. Cold oil thickens, and a lead-acid battery’s available output falls as its internal chemistry slows. The Battery Council International describes CCA as a cold-temperature starting measure, not a measure of reserve capacity or battery life. A number on a label answers one narrow question. It does not tell you how long a battery can power accessories.
When comparing batteries or jump starters, check whether the current rating follows the same test method. Some products list peak current, which is not directly comparable to SAE-rated CCA. A small print label can make that distinction easy to miss. Look for the test standard, then compare the vehicle maker’s recommended CCA with the device’s stated rating. Real cold, an aging battery, and corroded terminals can still change the result. The rating helps, but it is not the whole story.
Safe Connection Order: Connect Positive Clamps Before the Ground Clamp
A car battery jumper uses another battery or a portable power source to supply the current needed to start a vehicle. Safe connections matter because a misplaced clamp can cause sparks, damage electrical parts, or injure someone. Keep both vehicles switched off, set the parking brakes, and check the owner’s manuals before connecting anything. Do not jump-start a battery that is cracked, leaking, swollen, or frozen.
Connect the red clamp to the discharged battery’s positive (+) terminal. Attach the other red clamp to the assisting battery’s positive (+) terminal. Then connect the black clamp to the assisting battery’s negative (–) terminal. The final connection is the remaining black clamp, placed on a clean, unpainted metal ground point on the disabled vehicle, away from its battery and moving parts. Follow this order. The last connection may spark, so making it at a suitable ground point helps keep sparks away from battery gases.
Take a moment to check that the clamps are secure and cannot touch each other. That pause is easy to skip. Start the assisting vehicle, wait briefly, then try starting the disabled one, following the manual’s timing guidance. If it does not start, stop rather than repeatedly cranking it. Once the engine runs, remove the clamps in reverse order, beginning with the ground connection. I’d still recheck the manual; vehicle procedures can differ.
What Is a Car Battery Jumper and How Does It Work? — Safe Connection Order: Connect Positive Clamps Before the Ground Clamp
A car battery jumper uses a temporary electrical connection to help start a vehicle with a discharged battery. For conventional jumper cables, follow the vehicle manuals and connect the clamps in the order below.
| Step | Clamp | Connection Point | Purpose | Safety Check |
| 1 — Connect first | Red positive (+) | Positive terminal of the discharged battery | Begins the circuit at the vehicle that needs assistance. | Confirm the terminal is marked “+” or “POS.” Keep the clamp away from metal parts. |
| 2 | Other red positive (+) | Positive terminal of the assisting vehicle’s battery | Connects the positive sides of the two batteries. | Make sure the first red clamp remains secure and does not touch a negative terminal or bodywork. |
| 3 | Black negative (−) | Negative terminal of the assisting vehicle’s battery | Provides the negative-side connection from the assisting vehicle. | Keep the black clamp clear of the red clamps and all moving or hot engine parts. |
| 4 — Connect last | Other black negative (−), used as the ground clamp | An unpainted, sturdy metal grounding point on the disabled vehicle, preferably away from its battery; use the manual’s designated point if provided | Completes the circuit while placing the final connection away from the discharged battery. | Do not attach it to fuel lines, painted surfaces, thin sheet metal, or moving parts. Follow the vehicle manual. |
| 5 | Start the vehicles as directed by their manuals | Keep the clamps connected and cables clear of fans and belts | Allows the assisting battery to supply starting current. | Do not crank for long, repeated periods. Stop if cables heat up, smoke appears, or a battery is damaged or leaking. |
| 6 — Remove in reverse order | Remove the clamps in this order: ground clamp, assisting vehicle’s negative clamp, assisting vehicle’s positive clamp, discharged battery’s positive clamp | Keep removed clamps from touching each other or metal surfaces | Reduces the chance of an accidental short circuit during disconnection. | Follow the vehicle manuals; some vehicles specify a different procedure or dedicated jump-start terminals. |
Important: Never allow positive and negative clamps to touch. Do not jump-start a frozen, cracked, leaking, or visibly damaged battery. Hybrid and electric vehicles may have specific jump-start restrictions; consult the owner’s manual before connecting a jumper.


